Pouring cooking oil down the drain is the single most common kitchen plumbing mistake — and the cause of more sewer backups than any other household behavior. Liquid oil solidifies as it cools, traps food debris, and over months and years builds into “fatbergs” that block municipal sewer lines. London’s most famous fatberg, the 250-meter Whitechapel mass removed in 2017, weighed 130 tons and cost £2 million to clean up. Most of it came from kitchen sinks.
After 22 years cooking on equipment that produces gallons of waste oil and five years researching residential disposal options, here is the complete guide to handling used cooking oil safely — including what to do if you’ve already poured oil down the drain and need to address the consequences.
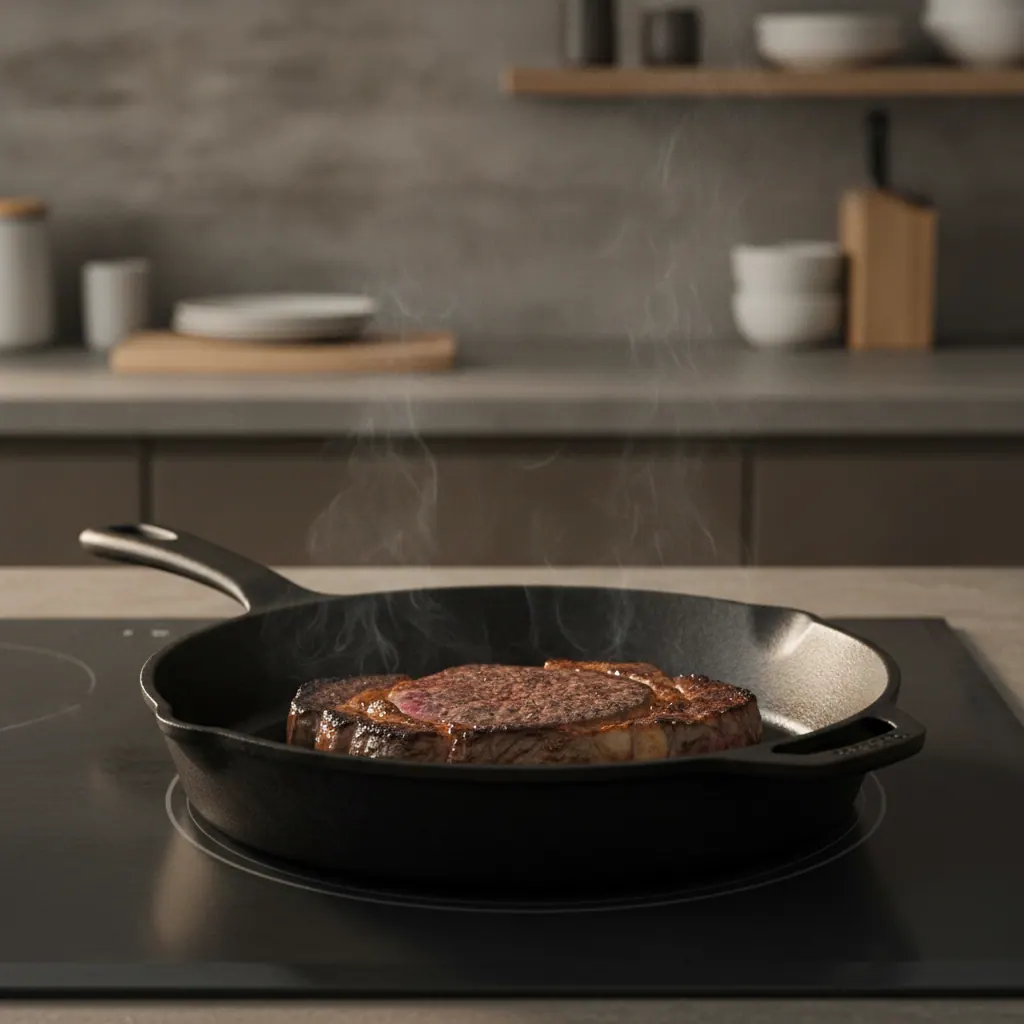
For the deep-frying technique that produces the most disposable oil, see our how to deep fry on induction. For frying-related kitchen safety more broadly, our gas cooktop smells like gas guide covers fire safety on the cooktop.
The cardinal rule: never down the drain
Never pour cooking oil into:
- Kitchen sink
- Bathroom sink
- Toilet
- Bathtub
- Storm drain
- Garden / direct soil
- Backyard / woods (large quantities)
This applies to all cooking oils — vegetable, canola, peanut, olive, avocado, coconut, lard, bacon grease, butter, ghee. Oils with higher saturated fat content (coconut oil, lard, bacon grease) solidify faster and clog more aggressively, but liquid oils are equally problematic over time.
Why down the drain is wrong:
- Pipe coating: liquid oil coats the inner walls of your kitchen pipes as it cools, reducing pipe diameter and trapping food debris.
- Solidification: at temperatures below 75°F, most cooking oils solidify into a wax-like substance. Inside cool basement pipes, this happens within minutes.
- Drain trap blockage: the P-trap under your sink (the curved pipe designed to hold water and prevent sewer gas) is the first place oil accumulates. Once blocked, the entire drain backs up.
- Sewer-level fatbergs: oil from thousands of households combines with disposable wipes, food debris, and minerals to form solid masses that block municipal sewer lines.
- Septic system damage: for homes on septic systems, cooking oil overwhelms bacterial digestion and shortens septic field life by 40–60%.
The “running hot water with the oil” trick doesn’t work — hot water keeps oil liquid only until it cools downstream of your sink. The oil still solidifies, just farther from your home.
Step-by-step disposal procedure

Step 1: Cool the oil completely
After cooking, let the oil cool in the pan for at least 4 hours before any handling. Hot oil (anything above 100°F) is a serious burn risk during transfer. For deep-frying batches at 350°F+, 6+ hours of cooling is safer.
Do not place hot pans of oil in the refrigerator — the temperature differential cracks glass storage containers and can damage refrigerator shelving. Counter cooling at room temperature is correct.
Never combine hot oil with cold containers — ceramic or glass jars at room temperature can crack from thermal shock when hot oil is poured in.
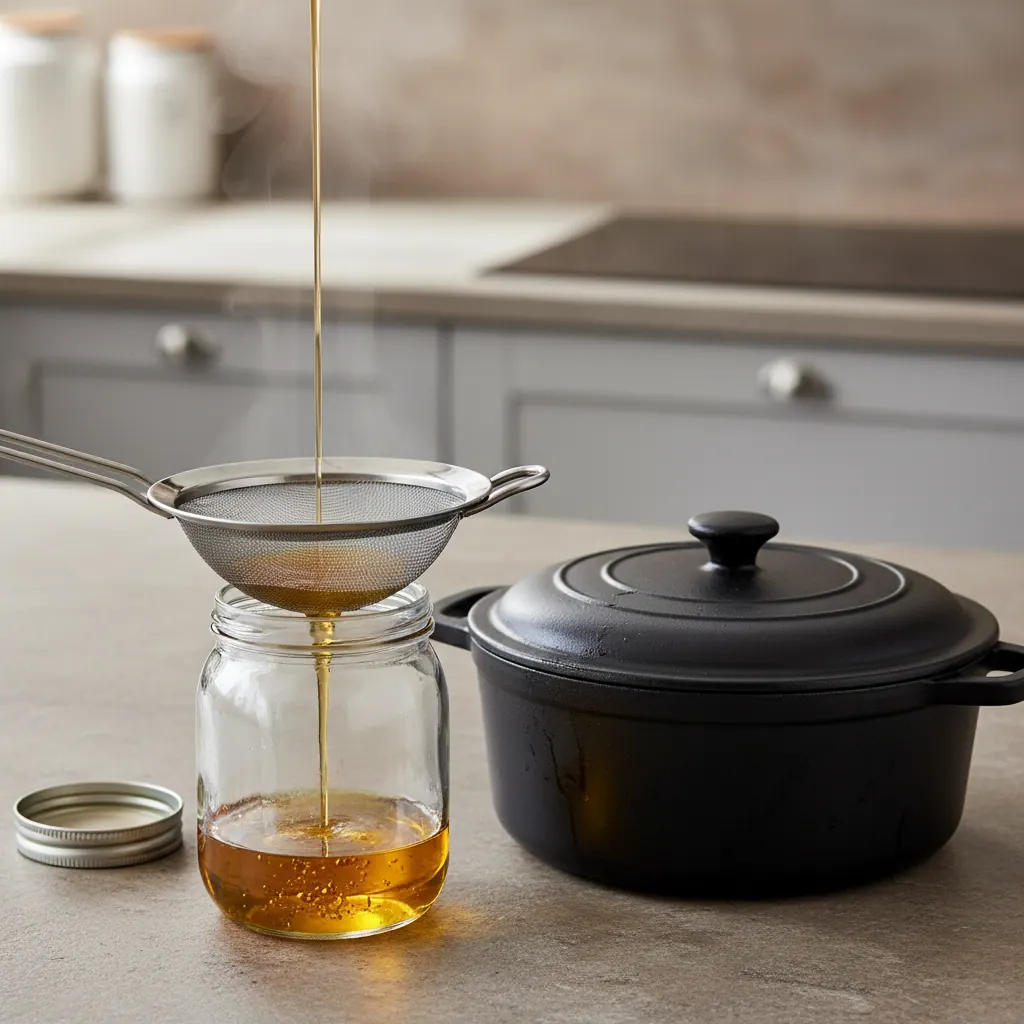
Step 2: Strain the oil
Use a fine-mesh strainer lined with cheesecloth or a paper coffee filter to remove food particles. Particles in the oil accelerate rancidity and create a mess in the disposal container.
For frying oil with significant solids, two-stage straining works best:
- First pass: standard fine-mesh strainer to remove large particles.
- Second pass: same strainer lined with cheesecloth or coffee filter for fine debris.
Step 3: Choose a disposal container
| Container | Pros | Cons | Best for |
|---|---|---|---|
| Original oil bottle | Free; properly sized | Plastic must be clean and dry | Reusing oil; small quantities |
| Glass mason jar | Reusable; easy to clean | Can break | Saving oil for reuse |
| Plastic milk jug (clean) | Free; large capacity | Must be completely dry | Large disposal quantities |
| Commercial oil disposal bag | Designed for purpose; landfill-safe | Single-use; cost $0.50–$1 each | One-time large disposal |
| Empty paper milk carton | Biodegradable container | Less leak-proof | Quantities under 1 quart |
The container must be completely dry — water in oil promotes rancidity and leaks during disposal.
Step 4: Label and store
Mark the container clearly: “USED COOKING OIL — DO NOT USE.”
The labeling matters. Used cooking oil looks similar to fresh oil — a household member could accidentally use it for cooking, with off-flavors and possibly food-safety issues. The label prevents this.
Store at room temperature, out of direct sunlight. Refrigeration is unnecessary unless you’re saving oil for reuse and the kitchen is unusually warm (over 80°F).
Step 5: Dispose
Three legitimate options, in order of environmental preference:
Option 1: Recycle for biodiesel (best) Many US municipalities offer cooking oil recycling for biodiesel production. The oil is processed into transportation fuel — the most beneficial environmental use. Check with:
- Your city’s hazardous waste collection days
- Local automotive parts stores (some collect for processing)
- Yellow grease collection bins (often near recycling centers)
- Restaurant grease haulers (some accept residential drop-offs)
Option 2: Solid waste disposal (acceptable) For small quantities (<1 cup), the simplest approach:
- Soak up with absorbent material (paper towels, kitty litter, coffee grounds, sawdust)
- Place in a sealed container or bag
- Dispose with regular trash
This is acceptable for occasional small disposals but not ideal for large frying-batch quantities.
Option 3: Solidify and trash (for larger quantities) For quantities up to 1 quart:
- Pour into a sealed container
- Refrigerate or freeze until solid
- Dispose with regular trash, sealed
This works for all cooking oils, including those that don’t fully solidify at room temperature (peanut, canola).
Reusing frying oil: the rules
Used frying oil can be reused 2–4 times before quality degrades. Proper reuse saves money and reduces waste — a half-gallon of oil for one fry session is wasteful when it can serve 3–4 sessions with proper handling.
Storage rules
| Rule | Why |
|---|---|
| Strain immediately after cooling | Food particles accelerate rancidity |
| Store in opaque or dark container | UV light degrades oil quickly |
| Seal tightly | Oxygen exposure causes oxidation |
| Room temperature, away from heat | Heat accelerates degradation |
| Use within 1 month | Even properly stored oil degrades over time |
| Label with date | Track storage time |
Signs the oil should be discarded
| Sign | What it means |
|---|---|
| Dark brown or syrupy color | Oxidation past acceptable level |
| Rancid or sour smell | Free fatty acids — oil is degrading |
| Foaming during heating | Polymerization — oil structure breaking down |
| Smoking at lower temperature than fresh | Smoke point has dropped — oil is degraded |
| Bitter or off taste in food | Fatty acids transferring to food |
Cross-flavor rules
Oil absorbs flavors from what was cooked in it:
- Fish or shellfish oil: never reuse for non-fish applications (sweet, vegetable). Pungent fish flavors transfer.
- Heavily-spiced food oil (Indian, Cajun): reuse only for similar applications.
- Sweet applications (donuts, churros): use only fresh oil. Used savory oil makes sweet items taste odd.
Storage life by application
| Use | Reuses | Storage |
|---|---|---|
| Plain potato fries | 4–6 times | 1 month |
| Fried chicken | 2–3 times | 2 weeks |
| Fish fry | 1–2 times | 1 week (fish flavor is strong) |
| Tempura | 3–4 times | 3 weeks |
| Donuts | 1 time | Discard same week |
What if you’ve already poured oil down the drain?

If you’ve poured cooking oil down a drain — even just once — and noticed slow drainage, gurgling sounds, or smell, take action quickly.
Light cases (slow drain, minor blockage)
- Boiling water: pour 1 quart of boiling water down the drain. May dislodge fresh oil deposits.
- Baking soda + vinegar: 1 cup baking soda, then 1 cup white vinegar. Wait 30 minutes. Flush with hot water.
- Enzyme drain cleaner (Bio-Clean, Drain-Out): biological enzymes that digest grease. Apply per package directions.
Moderate cases (significant blockage, standing water)
- Plumbing snake (drain auger): manually break up the blockage. Available at hardware stores for $25–$50.
Severe cases (full backup, multiple drains affected)
- Professional drain cleaning: hydro-jetting service, $200–$500. Necessary for established fatbergs in the main line.
Avoid commercial chemical drain cleaners (Drano, Liquid-Plumr) — they’re caustic, damage older PVC and metal pipes, and don’t effectively dissolve solidified grease anyway. Enzyme-based products are better.
Prevention going forward
If you’ve had grease backup once, install a drain strainer ($10) on every kitchen sink. Strainers catch food debris and serve as a constant visual reminder not to pour anything thick through the drain.
Common questions about specific oil types
Bacon grease
Most aggressive blocker due to high saturated fat content — solidifies at room temperature. Common kitchen practice: store in a heat-safe container (Pyrex measuring cup, mason jar) and reuse for cooking. Bacon grease is excellent for sautéing greens, frying eggs, or seasoning cast iron pans. Store in the refrigerator (it solidifies completely) and use within 6 weeks.
Olive oil
Lower smoke point means it’s typically used for shallow cooking, not deep-frying. Used olive oil from sautéing can usually be wiped from the pan with paper towels and disposed in the regular trash. For larger quantities, use the standard oil disposal procedure.
Coconut oil
Solidifies at temperatures below 76°F. After cooking, let it solidify in the pan, scoop out with a paper towel, and dispose with regular trash. The naturally solidifying property makes coconut oil disposal among the easiest.
Peanut oil (large frying batches)
The most common deep-frying oil for chicken and turkey frying. Quantities can be substantial (1 gallon+ for a deep fryer). For 1+ gallon disposals, recycle through municipal hazardous waste programs or a registered grease hauler. Do not put gallons of peanut oil in regular household trash.
Canola/vegetable oil
The most common general-purpose cooking oil. Standard disposal procedure: cool, strain, contain, dispose with solid waste or recycle.
Environmental and economic impact
The numbers on residential cooking oil disposal:
- Average US household: produces 1–4 quarts of waste cooking oil per year.
- Down the drain: an estimated 30–40% of US households improperly dispose of cooking oil down sinks.
- Sewer maintenance cost: US municipalities spend $25 billion annually on grease-related sewer cleaning.
- Biodiesel potential: 1 gallon of used cooking oil produces 0.9 gallons of biodiesel — diverting cooking oil to biodiesel programs has meaningful energy and emissions benefits.
Proper disposal isn’t difficult — once you set up a system (a labeled jar in the pantry, periodic recycling drops), it adds 30 seconds to your cooking workflow and avoids significant environmental harm.
For our deep-frying technique that produces the most disposable oil, see how to deep fry on induction.
Bottom line
Cool, strain, contain, dispose with solid waste or recycle. Never down the drain.
The 4-step procedure is simple enough that there’s no excuse for getting it wrong. The cost of doing it right is 30 seconds and a clean container. The cost of doing it wrong is plumbing repairs ($200–$2,000), sewer impact, and environmental damage that compounds across millions of households.
If you fry frequently or cook with significant oil quantities, set up a permanent disposal jar in the kitchen — a labeled mason jar in the pantry that accumulates used oil over a few weeks, then gets dropped at recycling when full. This converts disposal from a one-time decision into a routine.
For the cooktop technique that minimizes oil consumption (induction’s faster heat-up means smaller batches and less wasted oil), see our induction cooktops 2026 guide.
Frequently asked questions
How do you dispose of used cooking oil?
Four-step method: cool completely (4+ hours), strain through fine-mesh or cheesecloth to remove particles, transfer to a sealable container, dispose with solid waste (small quantities) or local recycling program (larger quantities). Never pour into any drain.
Can you pour cooking oil down the drain?
No — never. Cooking oil solidifies in pipes as it cools, traps food debris, and over time builds into fatbergs that block municipal sewers. Even small daily amounts add up. The “running hot water” trick doesn’t work — oil solidifies downstream regardless.
How do you store used cooking oil before disposing?
Any sealable leak-proof container: refilled oil bottle, glass mason jar, clean milk jug, or commercial disposal bag. Always label “USED COOKING OIL.” Room temperature, out of sunlight. Dispose within 1–2 months.
Can you reuse cooking oil after deep frying?
Yes — 2–4 reuses for properly strained and stored frying oil. Strain immediately after cooling, seal in opaque container, room temperature, use within 1 month. Discard if rancid, dark/syrupy, foaming during heat, or smoking at lower temperature than fresh.
Where can I recycle used cooking oil?
Most US municipalities offer residential cooking oil recycling — search “[your city] cooking oil recycling” for drop-off locations. Common sites: city hazardous waste days, automotive parts stores, yellow grease bins. Some restaurants accept small clean quantities for their commercial collection.
Disposal guidance per US EPA Solid Waste Disposal guidance and municipal sewer maintenance recommendations from major US cities (NYC, LA, Chicago). Reuse criteria from FDA Cooking Oil Quality Standards and ATIA (Association of Technical Importers and Allied) commercial fryer-oil best practices. Updated May 2026.