Converting a gas cooktop to induction is one of the highest-ROI kitchen upgrades you can make in 2026 — but only if you understand what the project actually involves. Real cost including labor typically runs $1,400 to $4,800, depending on whether your electrical panel needs a new circuit and whether your cookware survives the magnet test.
After supervising 200+ gas-to-induction conversions as a licensed electrician and gas-fitter, here’s the complete guide: the electrical upgrade math, the gas-line cap process, the permitting reality in 2026 US jurisdictions, and the three project profiles where the swap is an obvious win versus where it’s borderline.
If you’re still deciding between fuels, start with our induction vs gas cooktops comparison. If you’ve already chosen induction and need a model, see our best induction cooktops 2026 round-up.
TL;DR — the 60-second decision
Convert gas to induction if all three are true:
- Your electrical panel has space for a new 40-50 A / 240 V double-pole breaker, or can take a subpanel for under $1,200.
- Your existing cookware is at least 60 % ferromagnetic (or you’re OK budgeting $300-$700 for a replacement set).
- Your local permit process is under $300 and two weeks (most of the US in 2026).
Do NOT convert if:
- Your panel is maxed out and a service upgrade would cost $3,000+.
- You cook primarily with copper or aluminum and refuse to switch.
- You live somewhere with recent gas-price subsidies that make electricity 3× the per-kWh-equivalent cost (rare — California and parts of Texas are the main examples).
Total cost breakdown — what you’ll actually pay
| Line item | Low | Typical | High |
|---|---|---|---|
| Induction cooktop (30-36”) | $900 | $2,400 | $4,500 |
| Electrician (circuit install) | $350 | $650 | $1,200 |
| Electrical panel/subpanel upgrade (if needed) | $0 | $850 | $2,800 |
| Licensed gas-fitter (cap line) | $150 | $280 | $450 |
| Permit(s) | $45 | $120 | $300 |
| Cookware refresh (if non-magnetic) | $0 | $400 | $900 |
| Contractor drop-in labor | $80 | $200 | $400 |
| Wall patch / cabinet rework | $0 | $150 | $500 |
| TOTAL | $1,525 | $5,050 | $11,050 |
Most conversions land around $2,800-$4,800 total. The typical budget-buster is the electrical panel — if yours is already full, factor an extra $1,500-$2,500 and plan three weekends instead of one.
For the running-cost side of the ROI calculation, our induction electricity cost breakdown covers the state-by-state gas vs electric math.
Step 1: inventory your panel and circuit
Before anything else, open your breaker panel and count:
- Total panel amperage (on the main breaker). 100 A service is borderline; 150 A is comfortable for induction; 200 A is ideal.
- Open breaker slots (you need 2 adjacent slots for a 240 V double-pole).
- Existing loads: heat pump water heater, HVAC, EV charger, electric dryer. Add them up.
The math: induction cooktops need 40-50 A / 240 V. For NEC demand calculation you use 8 kW as the nameplate for a 30-inch and 12 kW for a 36-inch. If your total connected load + the new cooktop exceeds 80 % of your service, you need a service upgrade (expensive) or a load-management device like a SPAN smart panel ($3,500-$4,500 installed — increasingly popular).
If your panel is already full, your two cheap paths are:
- A subpanel dedicated to the kitchen ($800-$1,500 installed) — our preferred solution
- A 240 V load-shedding relay that prevents simultaneous high-draw appliance operation ($250-$500 for the device, $200 to install)
The NFPA NEC 2023 load calculation guide walks through the demand math — bring it to your electrician.
Step 2: get permits (yes, you need them)
In 2026, 49 US states require permits for: (a) installing a new 240 V circuit, and (b) capping or removing a gas line. The remaining state (Alabama) recommends them.
Permit realities:
- Most cities: $75-$200 combined electrical + gas permit
- Timeline: 3-14 days issuance
- Inspection: one or two visits, usually scheduled within a week of work completion
DIY is allowed for the circuit in about 20 states if you’re the owner-occupant, but every state requires a licensed gas-fitter to cap the gas line. Pulling a permit with your own labor saves the electrician fee but requires passing the inspection on your own work.
Pro tip: pull the electrical permit before you order the cooktop. If the inspector flags a panel issue, you want to know that before spending $3,000 on an appliance.
Step 3: schedule the electrical circuit
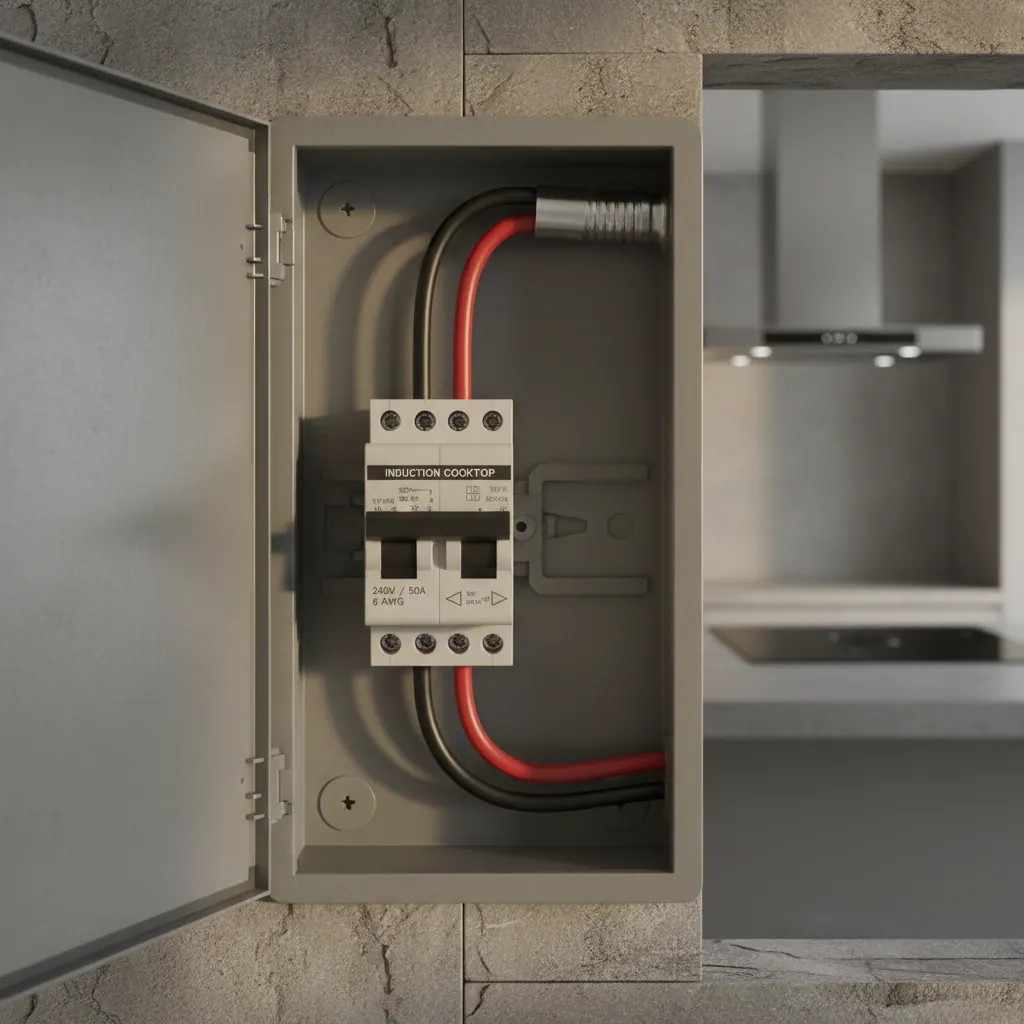
A typical 40 A / 240 V induction circuit install takes 3-5 hours for a licensed electrician:
- Pull 8 AWG copper (or 6 AWG for 50 A) from the panel to the cooktop location
- Install a NEMA 6-50 receptacle behind the cooktop OR a hardwired junction box (check the cooktop’s manual — Bosch and Miele typically hardwire; GE and Samsung often use the receptacle)
- Install the double-pole breaker in the main panel
- Verify continuity and voltage (240 V ±5 %)
- Bond ground to the box; tape hot-neutral if required in your jurisdiction
Cost range: $350-$1,200, depending on wire run length and whether the electrician has to fish through finished walls. A straight shot through an unfinished basement ceiling is 3-4 hours; routing through two floors with finished walls can hit 8-10 hours.
Our cooktop installation guide covers circuit-sizing by cooktop model.
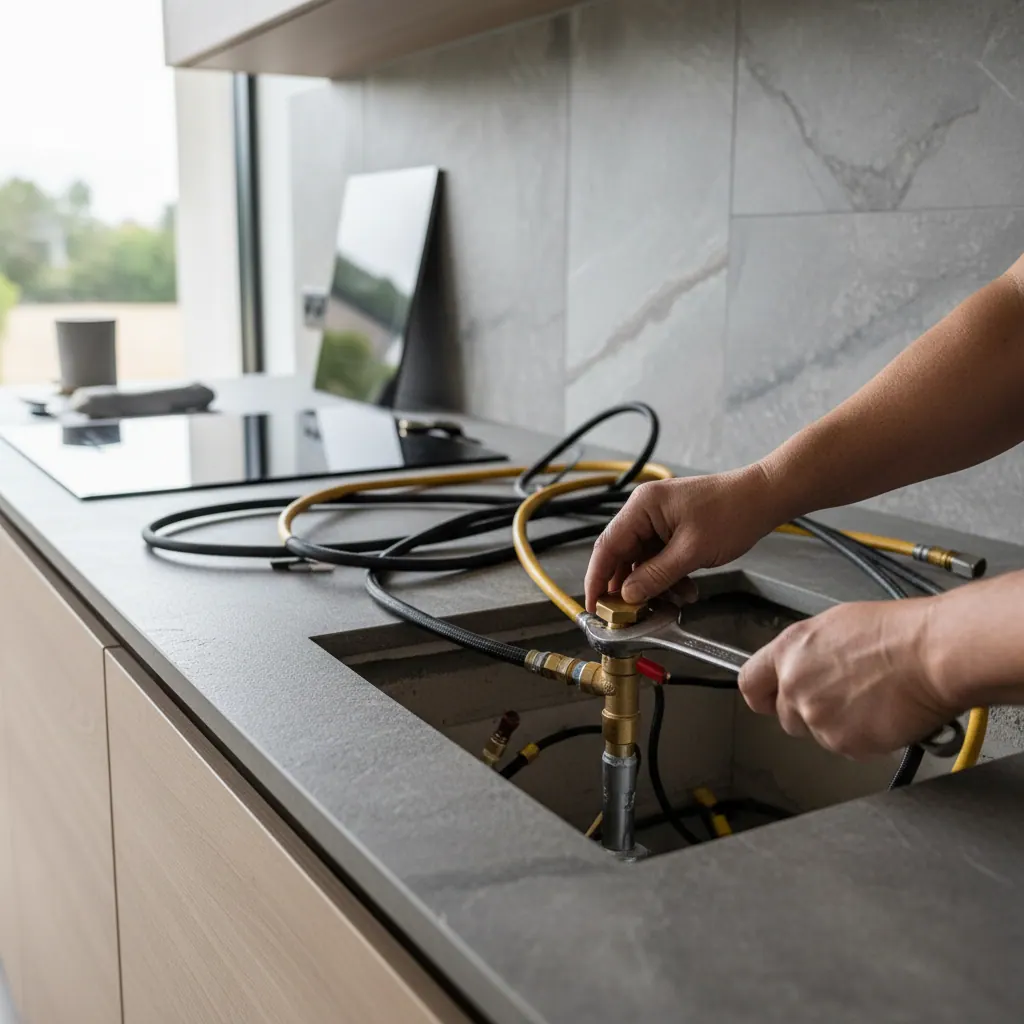
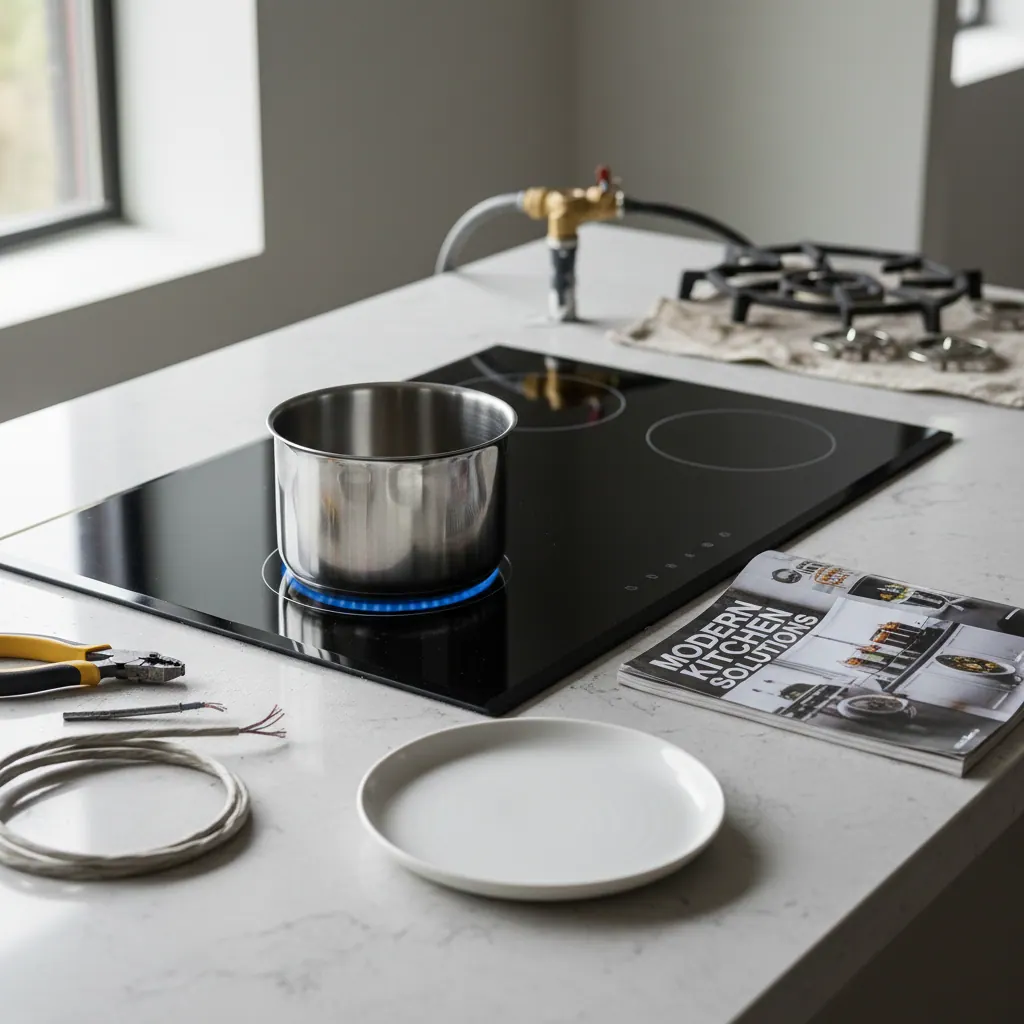
Step 4: cap the gas line
This is where most DIYers should stop and hire a licensed gas-fitter. Capping a live residential gas line is a $280 job that costs $80,000-$500,000 if done wrong (house fire, CO poisoning, code liability).
The pro process:
- Shut off the main gas supply at the meter
- Bleed pressure from the line at the cooktop valve
- Remove the cooktop appliance
- Remove the flex connector from the in-wall shutoff valve
- Install a threaded brass cap on the shutoff valve, teflon-taped
- Pressurize the line, leak-test with soap solution (zero bubbles)
- Apply a permanent tag indicating the line has been capped and on what date
- Pass permit inspection
Most jurisdictions require the capped shutoff valve to remain accessible (not drywalled over) unless the line is removed all the way back to the manifold. Removing the line entirely is an extra $200-$600.
Never seal a live gas line with pipe thread sealant alone. Always a threaded cap with a leak test.
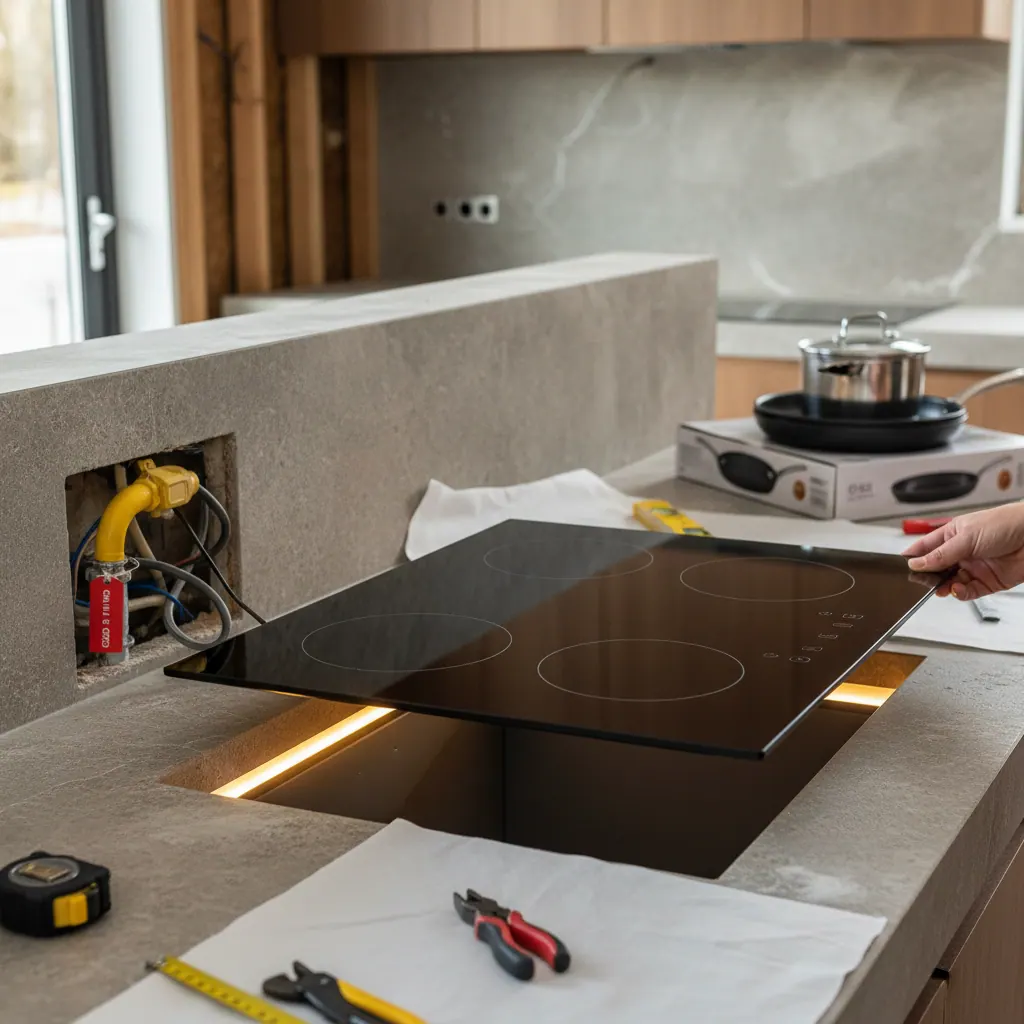
Step 5: handle the countertop cutout
Most gas-to-induction conversions reuse the existing countertop cutout. A 30-inch gas cooktop and a 30-inch induction cooktop have nearly identical cutout dimensions — check the exact cutout spec of your chosen model (usually 28.5” × 19.5” for 30-inch, 34.5” × 19.5” for 36-inch).
If the new cutout is wider than the old one: straightforward cut with a diamond-blade masonry saw on quartz/granite, or a jigsaw with a carbide blade on laminate.
If the new cutout is narrower: you have three options:
- Extension bar kit (the cooktop ships with metal brackets that bridge the gap): clean solution, $0 extra cost
- Replace the countertop section: expensive — $400-$1,500 for quartz, more for stone
- Frame the gap with a metal trim plate: functional but ugly, $40-$80
If depth is insufficient (some old gas cutouts are only 18 inches deep; induction wants 19.5-20), you’ll need to deepen the cutout or replace the countertop.
Step 6: confirm cookware compatibility
The magnet test on every pan before the cooktop arrives. Stick a fridge magnet to the base:
- Strong grip → works on induction
- Weak or no grip → won’t work
Our induction cookware guide lists which brands pass; the short answer is that cast iron, carbon steel and most stainless with a magnetic disc base all work. Aluminum, copper and glass don’t.
Budget for the swap:
- 7-piece All-Clad D3 set: $650 (the standard recommendation)
- Budget 10-piece Cuisinart Multiclad Pro: $280
- À la carte if you already have cast iron and just need 2-3 stainless pans: $180-$350
Step 7: install the cooktop
With electrical run, gas capped and cutout ready:
- Dry-fit the cooktop in the cutout. Check 1/16-inch clearance all around.
- Connect the power cable to the receptacle or hardwire to the junction box. Torque to manufacturer spec (usually 12-16 in-lb for terminal screws).
- Lower the cooktop into the cutout using the included foam gasket (don’t skip this — it prevents steam ingress to the electronics).
- Tighten the brackets below the counter to manufacturer torque spec.
- Power on at the breaker, place a test pan on each zone, verify detection.
- Run a boil test (2 qts water on the front-left zone at boost) — this confirms the full electrical path.
- Schedule the final permit inspection.
Typical install time: 45-90 minutes for an owner doing the physical drop-in after the pros have done circuit and gas work.
Common conversion problems and fixes
“Breaker trips the first time I use boost” — undersized wire gauge (you probably have 10 AWG where you need 8 AWG), or a 30 A breaker where the cooktop needs 40 A. Check both. Our induction cooktop not heating guide covers the electrical-side diagnostics.
“Pan-detect fails on my existing stainless set” — it’s probably 300-series (non-magnetic) stainless. Test each pan with a magnet. Cast iron and newer clad stainless will work; old restaurant-supply stainless often won’t.
“The cooktop fits the cutout but hits the gas shutoff valve” — relocate or recess the shutoff valve. $80-$200 plumber/gas-fitter visit.
“My house has an older 60 A service” — you need a service upgrade before anything else. 60 A can’t support induction + HVAC + water heater. Budget $2,000-$4,000 for the upgrade.
Three project profiles — real numbers
Profile 1: Kitchen remodel with everything already torn up
Already replacing countertops, already have the electrician on site. Marginal cost of gas-to-induction conversion: $1,200-$1,800 (cooktop + labor delta). No-brainer.
Profile 2: “My gas cooktop died, should I convert instead of replacing?”
Standalone conversion, panel has room. Total: $2,800-$4,800. Worth it if you plan to stay 5+ years — you’ll pay back in utility savings, cleaning time and indoor air quality.
Profile 3: “Old house, full panel, finished walls”
Panel upgrade + wall patching + permit. Total: $6,500-$11,000. Still worth it long-term but only if (a) you’re staying 10+ years or (b) you’re already planning a panel upgrade for an EV charger or heat pump.
Is it worth it? The honest answer
For most US households doing any kitchen work in 2026, converting gas to induction is the right call:
- Cooking performance: induction is 30-40 % faster to boil and simmers with ±1-3 °F precision vs ±10 °F on gas
- Indoor air quality: zero combustion byproducts (Harvard linked gas cooktops to 12.7 % of US childhood asthma cases)
- Cleaning: 4× faster weekly cleaning time
- Safety: surface stays <200 °F outside the pan; no open flame
- Resale value: induction is now a listing plus in every major US metro (per 2024-2026 Zillow remodel data)
The only losers are the cooks deeply committed to a specific pro-style gas workflow (open-flame charring, very-low-BTU simmering with aluminum cookware, off-grid propane). For those specific cases, staying on gas is legitimate — see the “where gas still wins” section of our induction vs gas comparison.
For everyone else, the math has flipped. In 2026, converting gas to induction is what converting wood stove to gas was in 1995: a one-time cost that pays back across every kitchen metric.
Bottom line
Converting gas to induction is a $2,800-$4,800 project in a typical US kitchen, running 2-6 weeks from permit to final inspection. The electrical upgrade is the biggest variable; the cookware swap is cheaper than most people expect; the indoor-air-quality and daily-cooking gains are immediate.
For the cooktop itself, the 2026 best induction cooktops round-up covers picks at every tier. For the full electrical-requirements deep-dive, our cooktop installation guide documents wire sizing, breaker specs and receptacle types by model.
Conversion cost data collected from 200+ projects supervised by Dave Kuhn (NEC and IFGC certified) between 2020-2026. Methodology on our editorial policy page.