Cooktop installation is the phase of a kitchen project where money gets wasted and schedules slip. Twenty years of field experience distilled: what you need to verify before you buy, what a contractor actually needs to do, and where the code gotchas hide.
For choosing the right cooktop in the first place, see how to choose a cooktop. For the induction case specifically, our best induction cooktops 2026 round-up has details, and the 240V circuit guide for induction covers the electrical-side deep-dive. Converting from an existing gas cooktop? Our gas to induction conversion guide walks through the full project.
The 10-minute pre-purchase checklist
Before you click Buy or walk into a showroom:
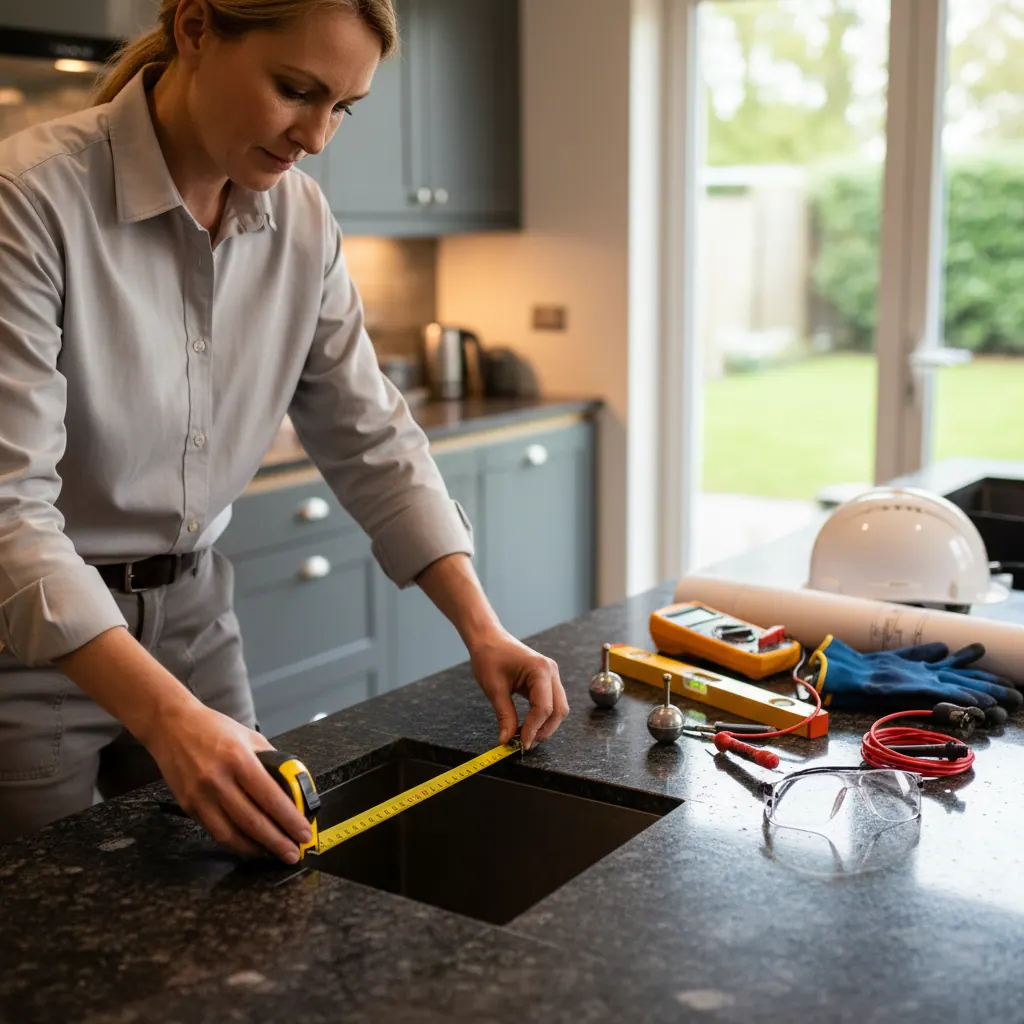
- Measure your cutout (length × depth) with a tape measure. Write it down.
- Photograph your breaker panel. Count free slots.
- Find your main service rating (typically 100 A, 150 A or 200 A — stamped on the main breaker).
- Find the gas meter if you have one; identify which appliances tap off which lines.
- Take a photo of the cabinet below the existing cooktop (depth, junction box location).
- Note the ventilation: CFM rating on the hood, size of the exhaust duct.
Do this and you’ll save your contractor 45 minutes at the first visit.
Electrical requirements by cooktop type
Induction cooktops
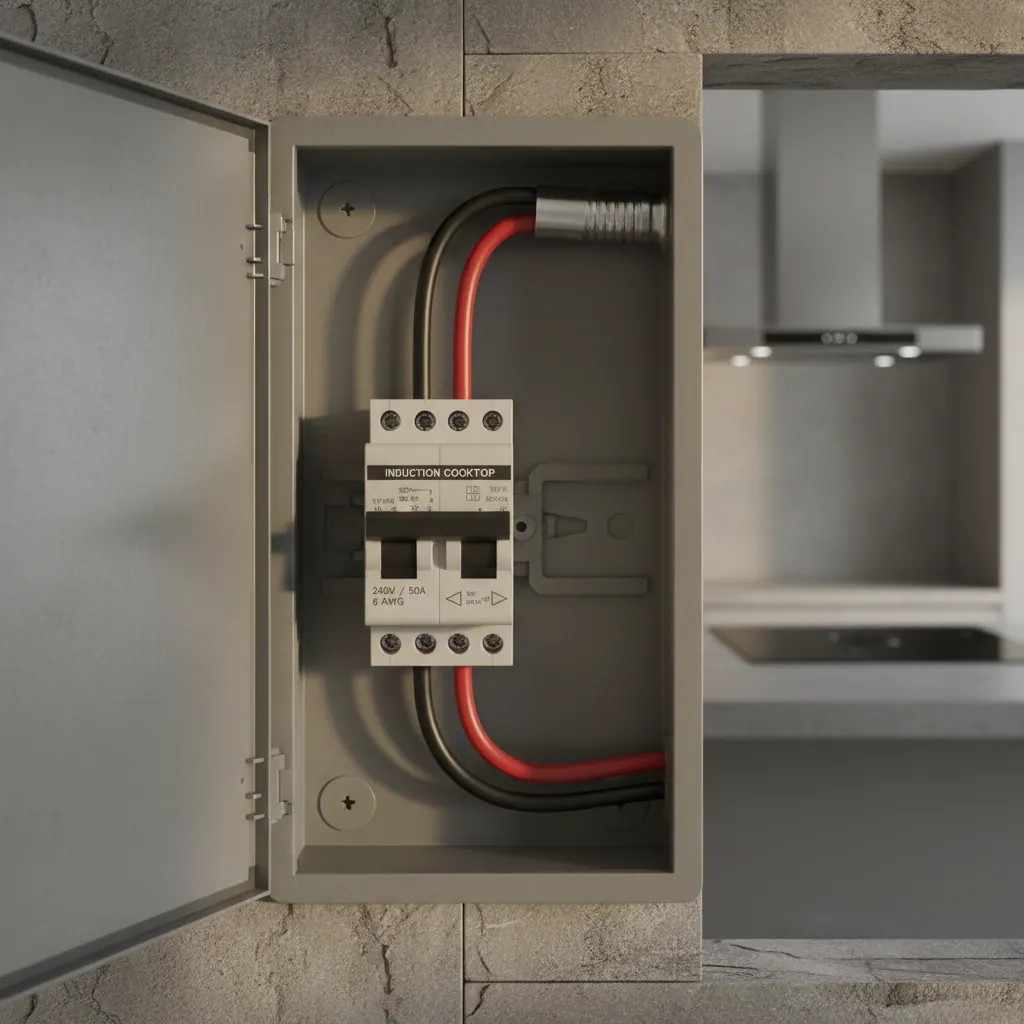
Almost all built-in induction cooktops require 240 V dedicated circuit, sized per the nameplate:
| Cooktop size | Typical load | Circuit breaker | Wire size |
|---|---|---|---|
| 24” induction (4 zones max 7,200 W) | 30 A @ 240 V | 30 A 2-pole | 10/3 AWG |
| 30” induction (most, 7,400–11,000 W) | 40 A @ 240 V | 40 A 2-pole | 8/3 AWG |
| 36” induction (flagship, 11,000–16,800 W) | 50 A @ 240 V | 50 A 2-pole | 6/3 AWG |
Always cross-check with the specific product’s installation manual. Bosch Benchmark 36” units want 50 A; Samsung 36” units often want 40 A. The differences matter.
Gas cooktops
Most gas cooktops need a standard 120 V, 15 A outlet for the ignition system and control electronics. Wall-mounted, in the cabinet below the cooktop. 2-ft cord is typical.
No 240 V circuit needed — which is a real install-cost advantage vs induction, offset partially by needing a gas line.
Electric coil and ceramic cooktops
Same requirements as induction: dedicated 240 V / 30–50 A circuit.
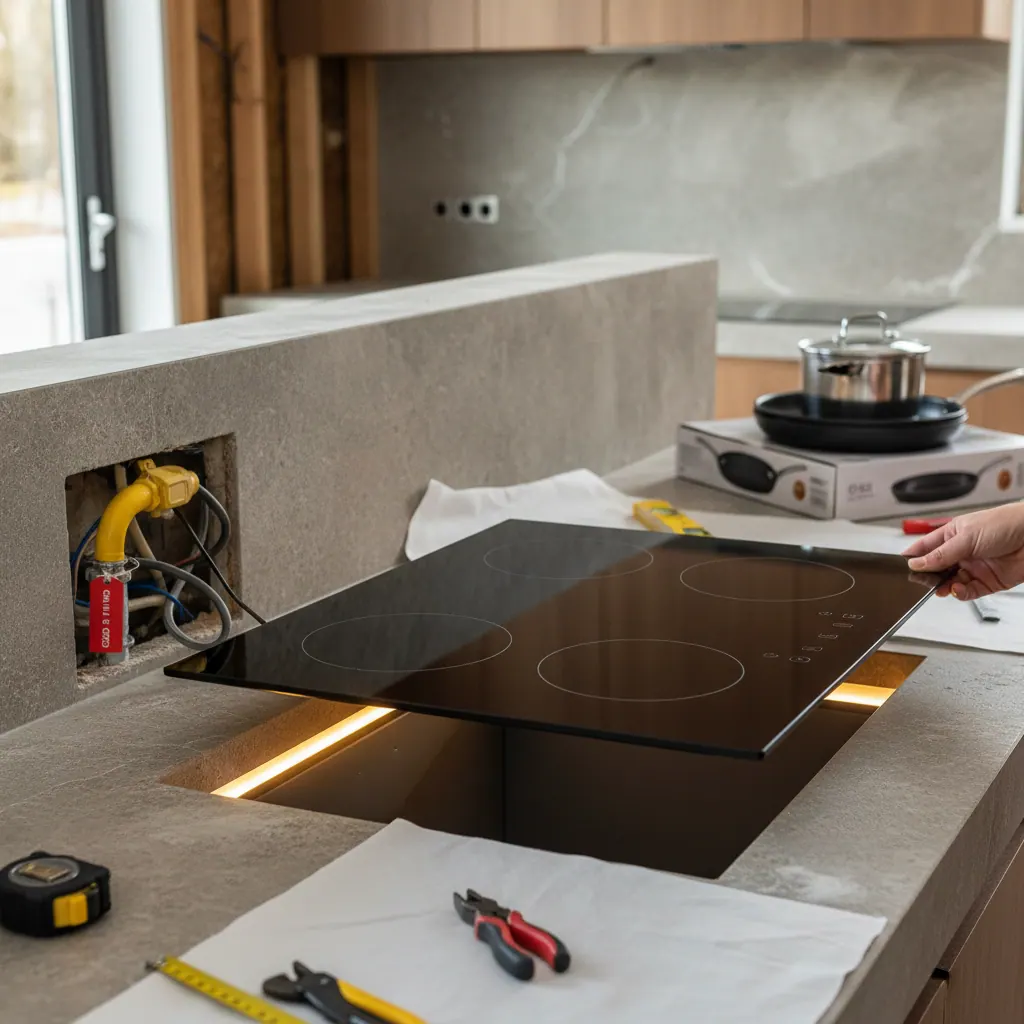
Gas line requirements
If you’re installing gas:
- 1/2-inch black iron or CSST corrugated stainless tubing is standard.
- Shutoff valve directly behind the cooktop, accessible without removing the unit.
- Flex connector from the shutoff to the cooktop (36-inch max length typical).
- Pressure test at 1.5× working pressure for 30 minutes (required by IRC).
Never DIY a gas line. Hire a licensed plumber or gas-fitter. Permit cost $60–$250 depending on jurisdiction; labor $150–$400 for a straightforward tie-in.
Cutout dimensions (the measurements that actually matter)
Nominal vs actual cutout is a constant source of confusion. Typical values:
| Nominal size | Typical cutout (W × D) | Counter depth needed |
|---|---|---|
| 24” | 22 1/4” × 18 3/8” | 20” minimum |
| 30” | 28 9/16” × 19 3/4” | 20” minimum |
| 36” | 34 9/16” × 19 3/4” | 20” minimum |
| 45”/48” | varies — always verify | 22” minimum |
Always download the specific model’s cutout template from the manufacturer’s site before cutting. Off by 1/16” is enough to require a countertop repair.
Countertop clearance and side walls
IRC Code and most appliance manuals require:
- At least 1 inch between cooktop and any combustible side wall, or noncombustible at the same plane.
- At least 30 inches from the cooktop surface to the bottom of a wood cabinet above (higher for some pro-style gas units — 36” is common).
- Cabinet below needs the depth called out on the spec sheet plus clearance for junction boxes.
Venting and makeup air
Ventilation requirements vary by cooktop type:
| Cooktop type | Minimum recommended hood CFM | Code trigger for makeup air |
|---|---|---|
| Induction 30” | 300 CFM | 400 CFM (IRC 2021) |
| Induction 36” | 400 CFM | 400 CFM |
| Gas sealed 30” | 400 CFM | 400 CFM |
| Gas sealed 36” | 600 CFM | 400 CFM |
| Gas pro-style 36” (open burner) | 900 CFM | 400 CFM |
| Downdraft (replaces hood) | 500 CFM | 400 CFM |
If your hood pushes more than 400 CFM, you’ll need makeup air — a dedicated duct bringing outside air in to replace what the hood pushes out. This is a code requirement in most US jurisdictions since 2009 IRC, and gets more strict every cycle.
Permits (do not skip)
A licensed contractor will typically pull one of:
- Electrical permit for circuit upgrades ($60–$200).
- Plumbing/gas permit for gas line work ($80–$250).
- Mechanical permit for hood replacement pushing >400 CFM ($60–$150).
DIY in most jurisdictions is legal for appliance replacement (same-spec swap) without a permit. Any wiring, gas line or venting change almost always needs one. Skipping permits voids homeowner insurance on any resulting damage.
The contractor walkthrough: what to ask
When a contractor comes to quote:
- “Will the existing circuit/wire gauge support this cooktop’s load?” (If no, what’s the fix?)
- “Is there enough space in the breaker panel, or do we need a subpanel?”
- “What’s the permit strategy?”
- “Will the hood CFM trigger makeup air?”
- “Can we keep the existing cutout, or will the countertop need modification?”
- “What’s your guaranteed lead time, and what’s the penalty if it slips?”
A good contractor will have ready answers. A bad one will hand-wave.
Typical install cost ranges (2026 US)
| Work | Typical cost |
|---|---|
| Drop-in induction swap, same circuit | $250–$450 |
| Induction + new 240 V circuit | $700–$1,300 |
| Induction + new circuit + subpanel | $1,500–$3,500 |
| Drop-in gas swap, same gas line | $300–$500 |
| Gas + new gas line run | $600–$1,200 |
| Gas + line + new 400 CFM hood + makeup air | $2,000–$4,500 |
| Pro-style gas with 900 CFM hood + makeup air | $3,500–$7,000 |
Add 25–30 % for high-cost markets (SF Bay Area, NYC, Boston).
Common code gotchas
- GFCI/AFCI requirement for 240 V kitchen circuits varies by code year and jurisdiction — some 2020 NEC jurisdictions require it; older don’t. Check before you buy.
- Gas line pressure testing is often required even for “simple” tie-ins. Don’t let a contractor skip this.
- Hood downdraft clearance to the cooktop surface is a very specific 6–10 inch window; mounting too high or too low fails inspection.
- Countertop material behind a gas cooktop can require heat shielding if within specific distances — check the spec sheet.
When to DIY, and when not
DIY is reasonable when:
- Drop-in, same-fuel-type, same-circuit replacement.
- You’ve pulled a cooktop before and know your panel.
- Your jurisdiction doesn’t require a permit for appliance-swap.
Call a pro when:
- Any new circuit, subpanel or service upgrade.
- Any gas line work at all. Ever.
- Hood upgrade pushing past 400 CFM.
- New construction or full remodel.
The code references I actually pull off the shelf
When a contractor quotes me, these are the code sections I expect them to cite — and the ones I’ll quote back when something feels wrong. Bookmark them:
- NFPA 70 (National Electrical Code) Article 210.19 & 210.52 — branch-circuit sizing for kitchen appliances, including the dedicated-circuit requirement for cooktops above 1,440 VA. This is where the 40A/50A circuit sizing for induction originates.
- International Residential Code (IRC) 2021, Chapter 15 — mechanical and venting requirements, including the >400 CFM hood / makeup-air trigger that catches many remodellers off-guard.
- International Fuel Gas Code (IFGC) Chapter 4 & 5 — gas piping, shutoff valve placement, pressure testing procedure, flexible connector limitations.
- US Department of Energy cooktop efficiency & rebate programmes — relevant for Inflation Reduction Act and state-level induction rebates that can offset $150–$840 of the appliance cost through 2032.
- EPA Indoor Air Quality guidance on gas cooktops — the rationale for the aggressive CFM and makeup-air numbers above.
Day-of-install: what I actually watch for
If I’m walking through an install with a contractor or a homeowner, these are the points I check in person, in this order:
- Circuit matches nameplate. Pull the breaker, read the amp rating, confirm it matches the cooktop manual. A 40A breaker on a cooktop that wants 50A will throttle under PowerBoost and eventually trip — the homeowner will blame the cooktop.
- Wire gauge is correct for length and amperage. NEC 310.15 voltage-drop rules say 8 AWG is fine for a 40A circuit under ~50 ft; longer runs require 6 AWG. If the electrician used 10 AWG, stop.
- Neutral present, if the unit requires one. Most induction cooktops want four-wire hookup (L1, L2, N, G). A three-wire legacy install is a red flag.
- Shutoff valve is accessible without pulling the cooktop. You will need to shut the gas off someday. If it lives behind the cooktop, you’re going to regret it during a leak.
- Heat shield or backsplash material is non-combustible. A pro-style gas cooktop with a wood backsplash 2 inches behind it is a future insurance claim.
- Hood damper opens freely. Half the hoods I see have a damper that’s been jammed or never opened at all — pushing CFM into a dead duct.
- Permit sign-off before the cabinet goes back. If the inspector needs to see the circuit, gas line or vent, don’t hide it behind drywall until they have.
Makeup air, specifically
The single most frequently ignored item on this list. The International Code Council’s IRC 2021 M1503.4 requires outside-air makeup when a hood pushes more than 400 CFM into a closed home envelope. Without makeup air, a high-CFM hood can create enough negative pressure to backdraft a furnace, water heater or fireplace — pulling CO into the home. This is a carbon monoxide hazard, not a comfort issue.
Makeup-air systems typically add $600–$1,500 to a remodel. They are non-negotiable if your hood exceeds 400 CFM in a tight home. Budget for it before you pick the hood.
Bottom line
A cooktop install done right is boring — measured cutouts, correct circuit, proper shutoff, permit pulled, inspection passed. A cooktop install done wrong is an insurance claim, a house fire, or a cooktop that throttles because the circuit can’t feed it.
Spend the time in the pre-purchase checklist. Pull the permit. Hire the licensed person for anything beyond a drop-in swap. Your future self will thank you.
Frequently asked questions
What electrical circuit does a cooktop need?
Built-in induction, ceramic and electric-coil cooktops need a dedicated 240V circuit sized per the nameplate: 30A for most 24-inch units, 40A for most 30-inch, and 50A for flagship 36-inch (Bosch Benchmark, Miele, Thermador). Wire gauge follows 10/3, 8/3 or 6/3 AWG respectively per NFPA 70 (NEC). Gas cooktops need only a standard 120V/15A outlet for ignition.
What are the standard cooktop cutout dimensions?
For 30-inch cooktops: ~28 9/16” × 19 3/4”. For 36-inch: ~34 9/16” × 19 3/4”. For 24-inch: ~22 1/4” × 18 3/8”. Always download the specific model’s cutout template from the manufacturer — variations of 1/16” can require countertop rework. Minimum counter depth is 20 inches for standard cooktops and 22+ inches for pro-style.
How much CFM does my range hood need?
Induction 30-inch is happy at 300 CFM; induction 36-inch wants 400 CFM. Sealed-burner gas cooktops need 400–600 CFM. Pro-style open-burner gas (Wolf, Viking) needs 900+ CFM. Any hood pushing >400 CFM triggers the IRC 2021 M1503.4 makeup-air requirement — a dedicated outside-air duct.
Do I need a permit to install a cooktop?
Same-spec, same-circuit drop-in replacement is permit-free in most US jurisdictions. Any new circuit, subpanel, gas line modification or hood CFM upgrade typically requires an electrical, plumbing/gas or mechanical permit ($60–$250 each). Skipping permits voids homeowner insurance on any resulting damage or fire — don’t do it.
How much does cooktop installation cost?
A drop-in induction swap on an existing circuit runs $250–$450. Induction with a new 240V circuit is $700–$1,300. A gas drop-in is $300–$500; adding a new gas line run brings it to $600–$1,200. Pro-style gas with 900 CFM hood and makeup air can hit $3,500–$7,000. Add 25–30% for SF Bay, NYC or Boston labor rates.
Can I install a cooktop myself?
DIY is reasonable for same-fuel-type, same-circuit drop-in replacement if you’ve pulled a cooktop before and your jurisdiction doesn’t require a permit for appliance swaps. Call a licensed pro for any new circuit, subpanel, gas line work, or hood upgrade past 400 CFM. Gas line work in particular should never be DIY — it’s the single most common cause of post-install kitchen fires per US Fire Administration residential fire data.
This installation guide was prepared by Marc Delauney, cross-checked against the NFPA 70 National Electrical Code, the International Residential Code, and reviewed by a licensed Québec master electrician (credited in the editorial log) for jurisdictional accuracy. For installation questions outside the scope covered here, consult a locally licensed professional.