Most range hood disappointment is a ducting problem, not a hood problem. The blower on the box was probably fine. What happened between that blower and the outdoors is what determines whether you got the airflow you paid for.
Three rules carry most of the weight. Rigid metal duct, never flexible. Never reduce below the hood’s outlet diameter. Keep elbows to a minimum. Everything below is elaboration.
Duct diameter: match the outlet, never neck down
Manufacturers size a hood’s outlet for the blower behind it. Reducing that diameter downstream throttles the entire system.
| System airflow | Minimum round duct |
|---|---|
| Up to 400 CFM | 6 in |
| 400–600 CFM | 8 in |
| 600–900 CFM | 10 in |
| 900+ CFM | 10–12 in |
If your hood has a 10-inch outlet, the duct is 10-inch. Not 8, not 6, and not “8-inch because that’s what fits between the joists.” When the joist bay genuinely will not accept round duct of the required size, the answer is rectangular transition duct of equivalent cross-sectional area, not a smaller round pipe.
Quotable takeaway: Never reduce duct below the hood’s outlet diameter. A 10-inch outlet necked to 6-inch round can cost a third of rated airflow before the air has traveled a single foot.
Rigid metal only
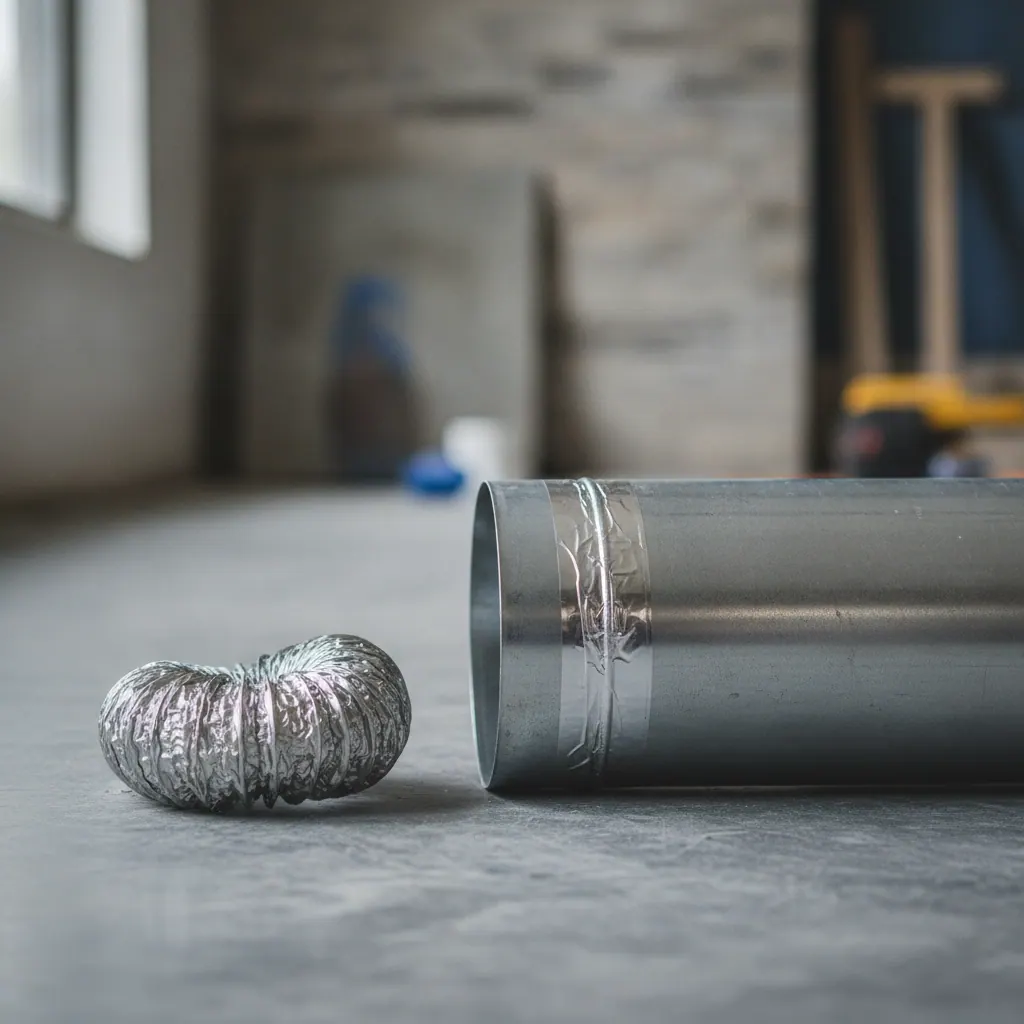
Flexible corrugated duct is acceptable for a bathroom fan and unacceptable for a kitchen hood, for two independent reasons.
Friction. The ribbed interior generates several times the resistance of smooth-wall rigid duct. A flex run cripples airflow in a way that no blower upgrade compensates for economically.
Grease. Kitchen exhaust is grease-laden. The accordion folds of flex duct trap it, accumulation builds where you cannot see or clean it, and grease in a duct is a fire load. This is why many manufacturers void warranty coverage on flex-ducted installations.
Use rigid galvanized or stainless round duct. Seal joints with foil tape or mastic — not cloth “duct tape”, which dries out, loses adhesion and fails within a few years. Fasten joints with screws that do not protrude excessively into the airstream, since protrusions catch grease.
Static pressure: the math that explains everything
The CFM printed on a hood is measured at zero static pressure — a bare blower on a test bench with nothing attached. Real installations add resistance, and airflow falls accordingly.
Resistance is expressed in equivalent feet: how much straight duct would produce the same pressure drop as a given fitting.
| Component | Approximate equivalent length |
|---|---|
| 90° elbow | 15 ft |
| 45° elbow | 9 ft |
| Wall cap with damper | 30 ft |
| Roof cap | 30–40 ft |
| Transition to smaller diameter | 5–25 ft |
Work an example. A hood 12 actual feet from an exterior wall, with two 90° elbows to clear a joist, terminating in a wall cap:
- 12 ft actual duct
- 2 × 90° elbow = 30 equivalent ft
- Wall cap = 30 equivalent ft
- Total: 72 equivalent feet
On a run like that, expect to lose roughly a third of rated airflow. To deliver 600 CFM at the cooktop, specify a hood rated around 900. This is the calculation behind the sizing recommendations in our range hood CFM guide, and it is why “buy more CFM than you think you need” is usually sound advice — right up until it pushes you over the makeup air threshold.
Practical consequences:
- Shortest, straightest run wins. A hood on an exterior wall with a 3-foot straight run out the back outperforms a far more expensive unit on an island with a 30-foot run.
- Two 45° elbows beat one 90° where geometry allows — 18 equivalent feet against 15 is roughly a wash, but gentler direction changes handle grease better and the difference narrows further with long-radius fittings.
- Long-radius elbows cost meaningfully less than tight-radius ones. Specify them.
Mounting height
Clearance is a fire-safety specification first and a performance specification second. The installation manual for your specific model governs. Typical figures:
- Induction and electric: 24–30 inches above the cooking surface
- Gas: 27–36 inches above the cooking surface
- Pro-style gas: often 30–36 inches, with model-specific minimums
Two competing pressures. Mount too low and you get head clearance complaints and, over a gas cooktop, a genuine heat-damage risk to the hood. Mount too high and the plume has spread by the time it arrives, so capture degrades and you need more airflow for the same result.
If you mount at the high end of the range, size the blower up. A hood at 36 inches over gas is doing a materially harder job than the same hood at 30.
Hood width
A rising plume spreads as it climbs. A hood that exactly matches the cooktop footprint is already undersized at capture height.
- Minimum: equal to cooktop width
- Better: 3 inches of overhang per side — a 36-inch hood over a 30-inch cooktop
- Gas and pro-style: treat the overhang as required
Check this against your cooktop’s actual dimensions rather than its nominal size. Our cooktop installation guide covers cutout dimensions, which are not the same as nominal width and vary between brands.
Termination: outdoors, always
Kitchen exhaust terminates outside the building. Through an exterior wall with a wall cap, or through the roof with a roof cap. Never into an attic, never into a soffit, never into a crawlspace or garage.
Venting grease-laden moist air into an enclosed building cavity deposits grease on framing and insulation, saturates the space, and produces a mold problem and a fire hazard simultaneously. It also fails inspection.
At the termination itself:
- Fit a backdraft damper so outdoor air, insects and cold do not come back in.
- Prefer caps without insect screens in the airflow path, or plan to clean them — screens clog with grease and become a major restriction.
- Keep the termination clear of windows, doors and air intakes per code-required separation distances.
- Slope horizontal runs slightly toward the exterior so condensate drains out rather than back toward the hood.
Insulation and condensation
Duct passing through unconditioned space — an attic, a vented crawlspace, an exterior chase — should be insulated. Warm, moist kitchen air meeting cold duct wall produces condensation, which runs back down the duct toward the hood and stains the ceiling.
This is a routine problem in cold climates and a routine surprise for homeowners, because it appears months after the remodel is complete.
Electrical and controls
Most residential hoods run on a standard 120 V / 15 A circuit. High-output and remote-blower systems may require a dedicated circuit — check the nameplate.
If the system is capable of exceeding 400 CFM, an interlocked makeup air damper is almost certainly required in IRC jurisdictions, and that interlock is part of the electrical rough-in. Wiring it after the fact means opening walls. See range hood makeup air requirements before the electrician finishes.
Consider a remote or inline blower if noise matters. Relocating the motor to the attic or an exterior wall moves the noise source away from the kitchen and often permits higher airflow at lower perceived loudness — worth evaluating against the sone ratings covered in the CFM guide.
Installation checklist
- Confirm hood width ≥ cooktop width, ideally +3 in per side.
- Confirm mounting height against the model’s manual.
- Size duct to the hood outlet, never smaller.
- Plan the shortest, straightest run to an exterior termination.
- Count equivalent feet; size the blower to deliver target CFM after losses.
- Use rigid metal, sealed with foil tape or mastic.
- Insulate duct in unconditioned space.
- Fit a backdraft damper at termination.
- If capable of >400 CFM, design makeup air and its interlock now.
- Confirm electrical requirements and circuit availability.
Bottom line
The duct decides the outcome. A modest hood on a short, straight, correctly sized rigid run will outperform an expensive one strangled by flex duct and elbows, every time. Plan the duct path before you choose the hood — the building will tell you what is possible, and the hood should be selected to suit it.
Working out how much airflow you need in the first place? Start with the range hood CFM guide. No duct path available at all? Ducted vs ductless range hoods covers what recirculating can and cannot do.
Frequently asked questions
What duct size does a range hood need?
Match the hood’s outlet and never reduce below it. As a general guide, 6-inch round suits systems up to about 400 CFM, 8-inch handles 400 to 600, 10-inch covers 600 to 900, and 900 CFM and above wants 10 to 12 inches. Necking a 10-inch outlet down to 6-inch round is the single most destructive thing you can do to a ventilation system — it can cost a third or more of the hood’s rated airflow before the air has traveled a foot.
Can you use flexible duct for a range hood?
No, and many manufacturers explicitly void the warranty if you do. Corrugated flex duct has a ribbed interior that generates several times the friction of smooth rigid metal, and its accordion folds trap grease, which turns a performance problem into a fire risk. Use rigid galvanized or stainless round duct, seal joints with foil tape or mastic rather than cloth duct tape, and keep the run as short and straight as the building allows.
How high should a range hood be above the cooktop?
Follow the specific model’s installation manual, because the clearance is a fire-safety specification as well as a performance one. Typical ranges are 24 to 30 inches above induction and electric cooktops and 27 to 36 inches above gas. Mounting higher than spec to clear a tall cook means capturing a wider, more diffuse plume, which requires more airflow to achieve the same capture — so if you mount high, size the blower up.
How much CFM does a 90-degree elbow cost?
Each 90-degree elbow adds resistance roughly equivalent to 15 feet of straight duct, and a 45-degree elbow about 9 feet. A wall cap with a damper adds around 30 equivalent feet, and a roof cap 30 to 40. A run with two 90-degree elbows and a roof cap has therefore consumed 60 to 70 equivalent feet of resistance before any actual duct length is counted, which is how a 600 CFM hood ends up delivering closer to 400 at the cooktop.
Can a range hood vent into the attic?
Never. Kitchen exhaust must terminate outdoors — through an exterior wall or through the roof with a proper cap. Venting grease-laden, moisture-heavy air into an attic, soffit or crawlspace deposits grease on framing and insulation, saturates the space with moisture, and creates both a mold problem and a fire hazard. It also fails inspection in every jurisdiction I am aware of.
Equivalent-length figures are industry rules of thumb for planning purposes; manufacturer data for specific fittings takes precedence. Duct and clearance requirements are set by your hood’s installation manual and by local code. See our editorial policy.